Unit Testing Composable Routing in Swift for iOS Apps - Part 3
My life changed in 2011 when I fell in love with iPhone and started working as an iOS Developer.
I'm passionate about clean and effective code, code review, organisation, agile work, sharing knowledge and experiences, but above all I'm passionate about building awesome products.
This is the third part of a series of articles about a Clean, Simple and Composable Routing for iOS apps. Have a read at the other articles before starting this one 😊
We setup our routing system by resolving the dependencies using a Dependency Container in the routes, as you've seen in the previous articles. Now it's time for us to write tests for them and validate how isolated and reusable our routing system is.
Automated Tests
Automated testing is finally picking up in the iOS community. Ten years ago, when I started in iOS development, one would barely hear about automated testing, the platform itself would provide few poor tools for it, and Apple wouldn't push us much for writing them either 🤐.
Five years later, around 2015, many job descriptions would still state that "experience with unit testing is desired" or "automated testing experience is a plus" 🤔.
Fast-forward to the present, I can't remember seeing job descriptions nowadays that don't require solid experience with automated testing (unit testing, integration testing, UI testing, etc) and continuous delivery. We can't escape from it anymore (well, we shouldn't anyway!) 😬.
Test automation reduces efforts for manual testing, increases predictability, reliability and resilience of the project. More importantly than validating the code you just wrote, is giving you and the team the confidence to update or extend it in the future, knowing that your business logic is being validated by automated tests.
Good test suits also help onboarding new engineers to the source code, or even remind your future self of the work done in certain parts of the application, as it may help you all understand better what's expected from the code by reading the tests.
There are many articles about how writing tests made people better developers. This is manly because in order to make your code testable you must design/architect it properly, by injecting dependencies, isolating responsibility, minimising state manipulation, writing more pure functions, etc. Applying these concepts not only make your code testable, but easier to maintain, extend and update. It's a win-win strategy!
If you're new to testing, especially in iOS, watch this 2017 WWDC session about Engineering for Testability and read a long list of great articles by John Sundell about unit testing.
Outside the iOS world (hey, we're all Software Engineers here, not only iOS Developers, right? 🤗), I can't recommend enough Martin Fowler's articles about testing. Martin is a reference in the software engineering community for his great posts about testing and architecture. Don't miss out!
Creating Mocks
Alright, back to where we left our project in the previous article, we could begin our work here by unit testing the main piece of the system, the DefaultRouter.
We want to have full control of our unit tests, being able to spy on the methods and properties which are being called by our class to validate its behaviour. In order to achieve that, we need to create "fake classes" (which I'll call mocks in this article for the sake of simplicity, but understand that there are many names and responsibilities for these doubles) by implementing protocols or subclassing objects.
Looking at the DefaultRouter's initialiser you'll notice that it takes a Transition interface (A.K.A. protocol) and a DependencyContainer. Interfaces are easy to mock, since we just need to implement their required methods and properties, but the container will be trickier, though, since it's a concrete object. If a route tries to resolve a dependency that's not registered in the container the route is holding, the tests will crash 😰.
There are a few solutions for this problem, for example, we can make the container conform to a new container protocol, so we can mock it properly, or we can register mocks for all dependencies in the app when running the tests.
I usually prefer to use interfaces instead of concrete objects because it makes the code more flexible, testable and conforms to SOLID and other good practices, but in this case in particular I don't.
Routes are the pipes of our a dependency graph's plumbing system that inject values in the controllers being presented. This means that regardless of having a mocked container or a real container instance, we need to make this container return the correct interfaces that the route needs. In the example below for our current LoginRoute, an instance that conforms to LoginViewModelInterface is expected to be returned by the container on line 17.
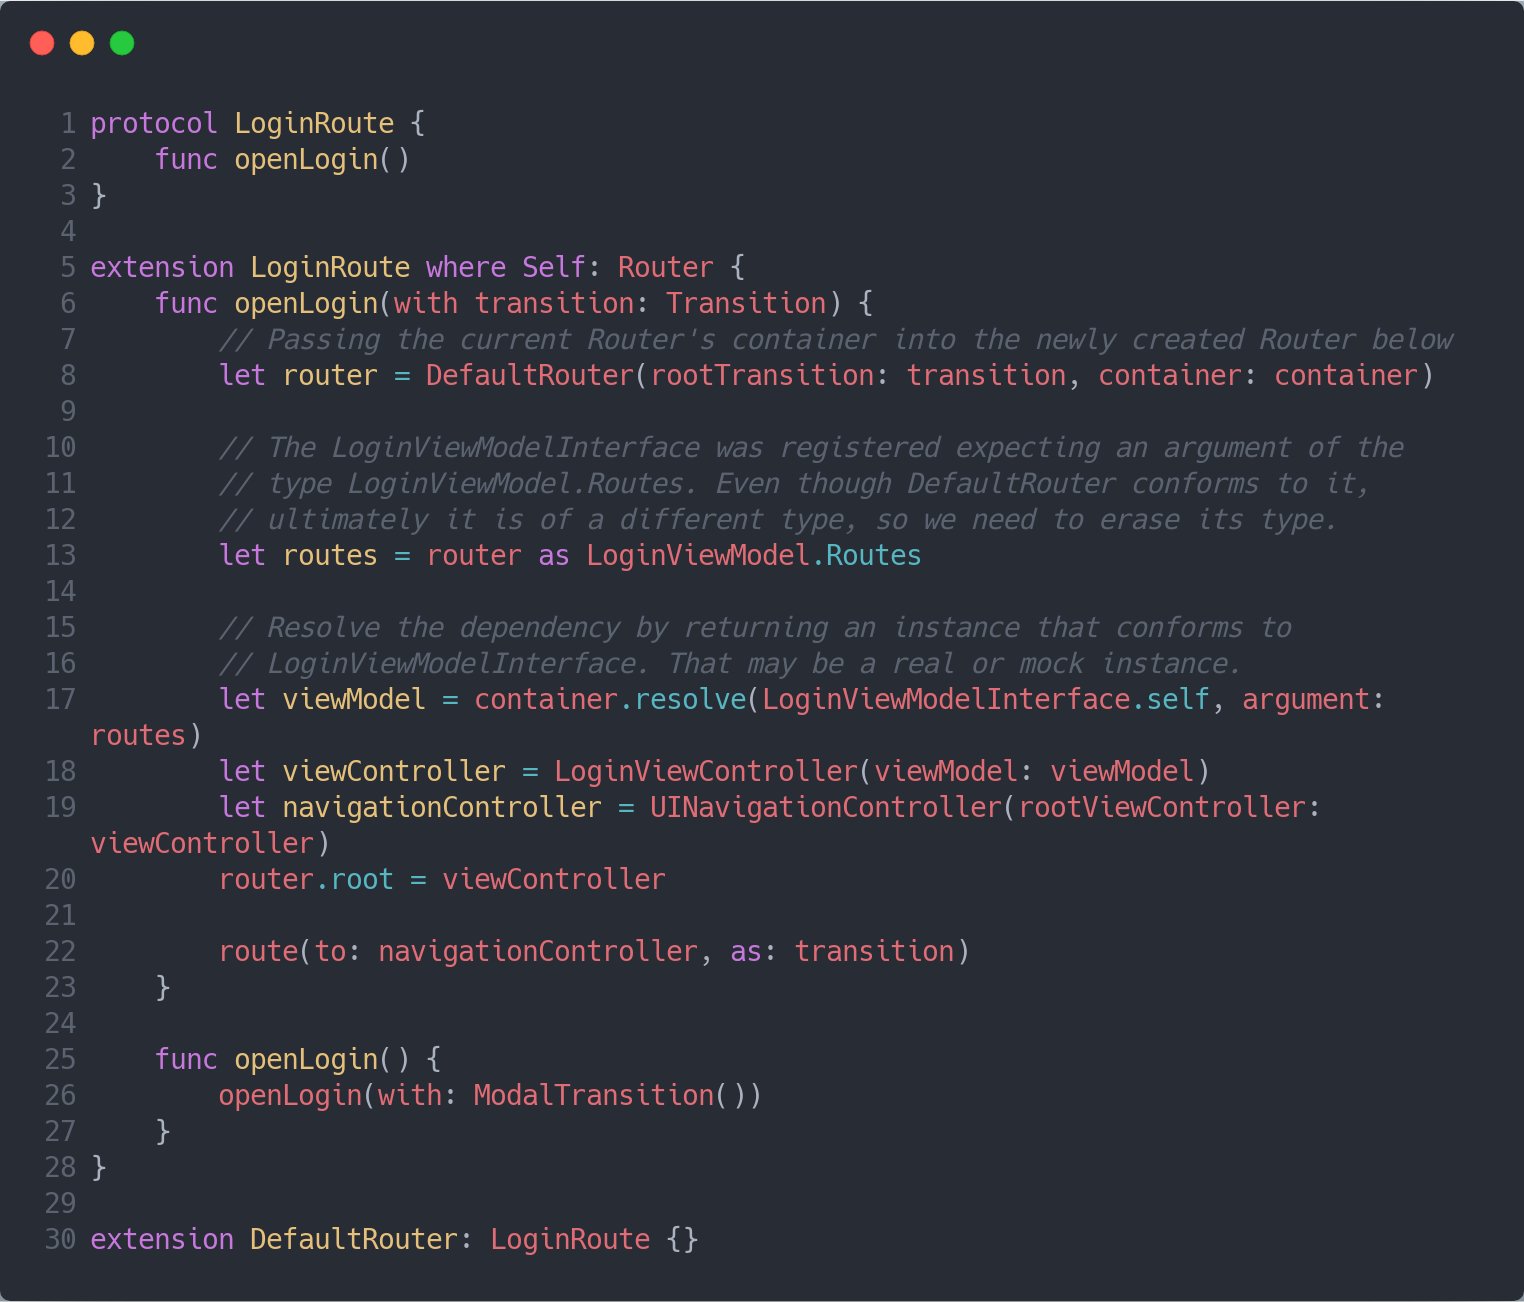
Creating an interface for this container in order to completely mock it will bring little value to us, it'll be easier to just to register the mocked dependencies directly to the real container, since the container framework is so simple.
Registering Mocks
In this sample application only view models are registered in the container. The same interfaces registered in the DependencyGraph.swift must also be registered in the container created for the unit testing target.
There are many code generation tools for generating mocks from interfaces in Swift. We will not use any of them in this sample app for the sake of simplicity, but I strongly encourage you to have a look and use them in your app, since they save you a lot of time writing boilerplate code. A few of them are Mockolo, Cuckoo and Sourcery's AutoMockable.
All our manually-created view model mocks will follow the pattern below:
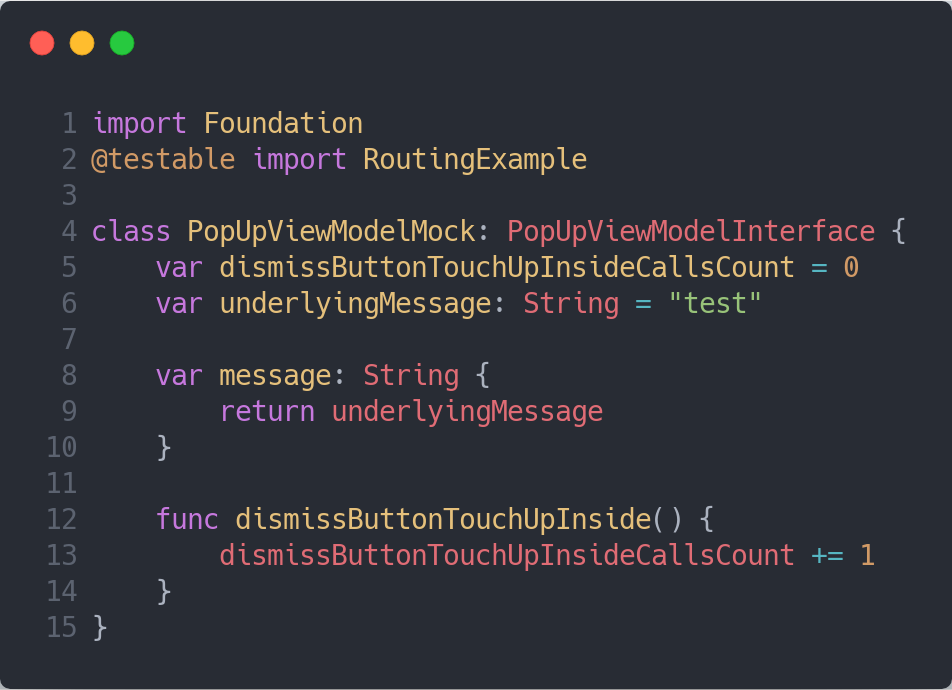
They implement the required methods by the interface and store how many times the methods were called. If the methods have input arguments, we store them too for further validation in the tests. The same applies to return values, where we define underlying values that'll be used as the returned values, as you can see on lines 6 and 9. Underlying values give us flexibility when writing unit tests to quickly change the expected return value of our mocks.
Once all view models mocks are created in the Unit Tests target, it's time to register them in our DependencyContainer. I like to create an extension for the container that's only visible in the unit tests target, to make it convenient to access the container with all dependencies mocked.
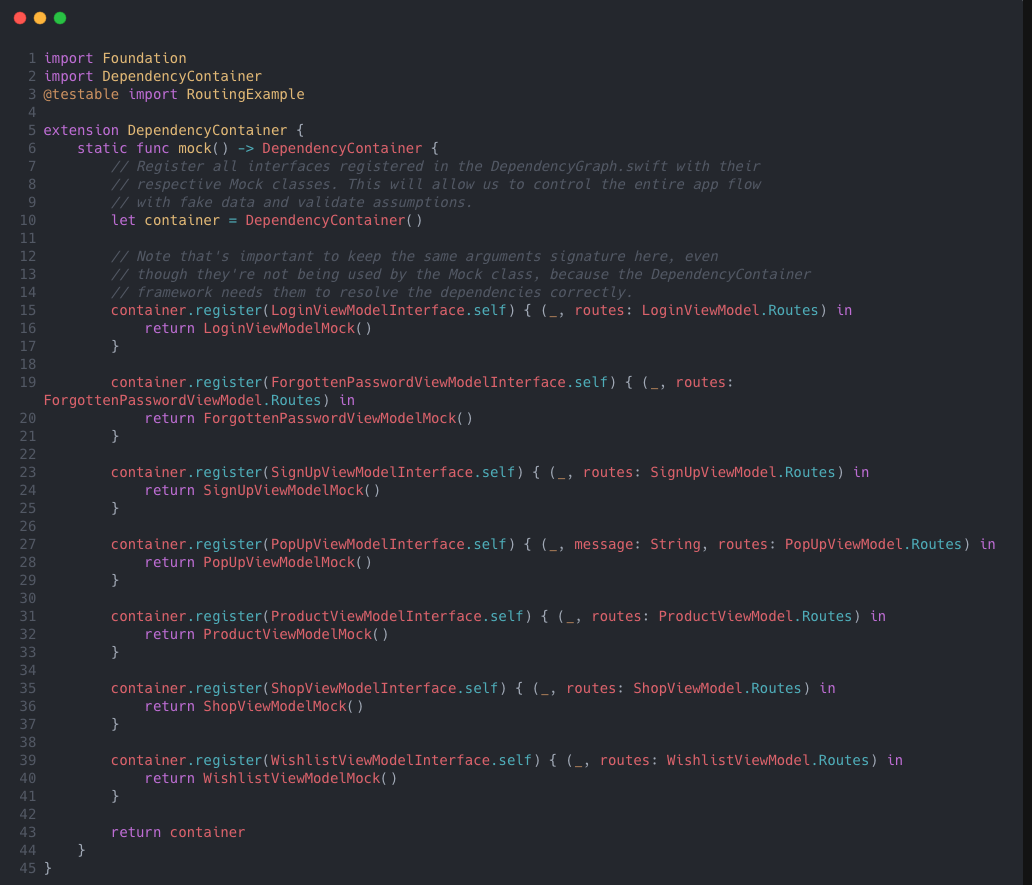
It's a real DependencyContainer instance, but all registered interfaces return mocked values when resolved👌.
Note that's important to keep the same arguments signature here, even though they're not being used by the
Mockclass, because theDependencyContainerframework needs them to resolve the dependencies correctly.
Testing the DefaultRouter
The last step before testing the DefaultRouter is to also write a mock for the Transition interface. Here it goes:
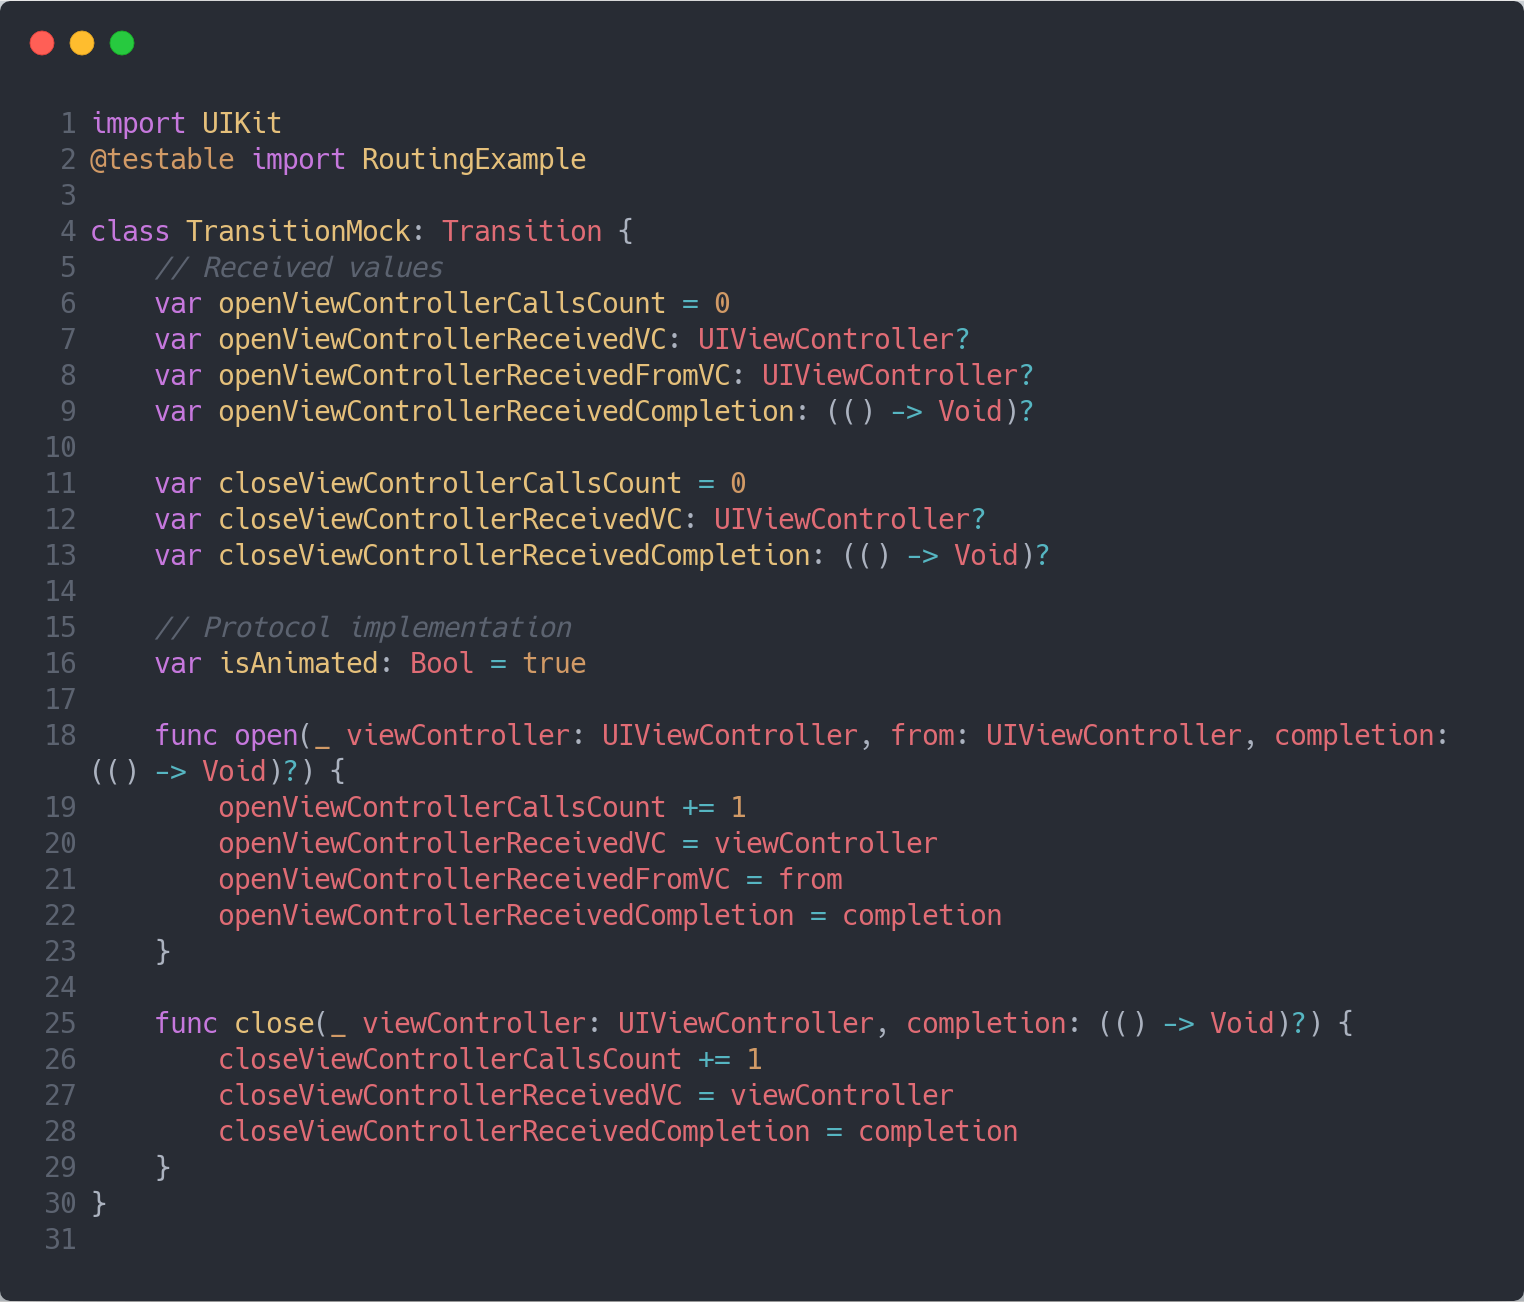
It's the same pattern applied for the view models.
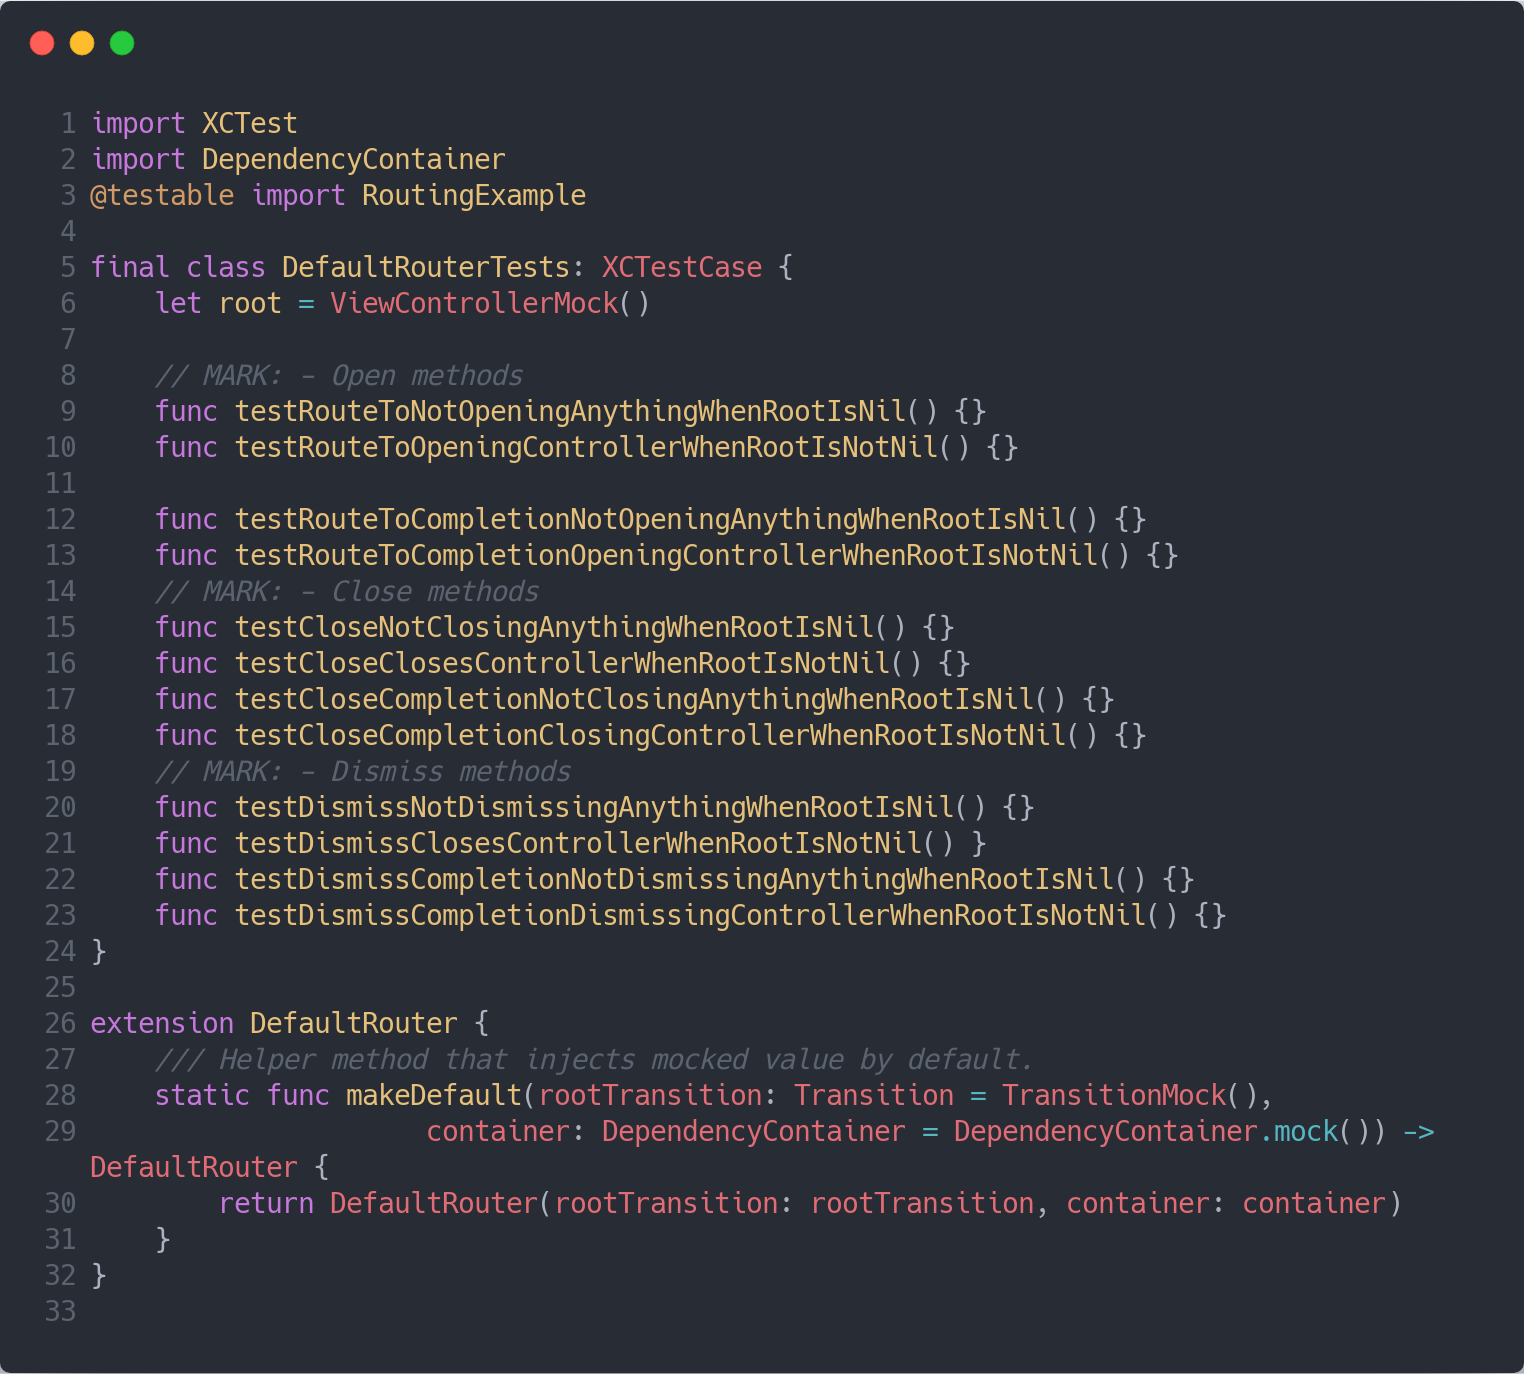
I find it very convenient as well to add extensions to the class that's going to be tested with default mocked values being assigned to its initialisation. In this way when adding new dependencies to the class, you don't need to update all tests, just the helper and the tests that may use the new dependency. Have a look at line 26:
On line 6 I'm making use of this UIViewController subclass that allows me to validate which view controllers have been pushed, presented, dismissed etc.
You've probably noticed as well that there are heaps of tests for this class. In the spirit of the unit testing, I've broken down each possible behaviour in a different test, making them very comprehensive. You can look at the full implementation here, but for now here's a couple of them:
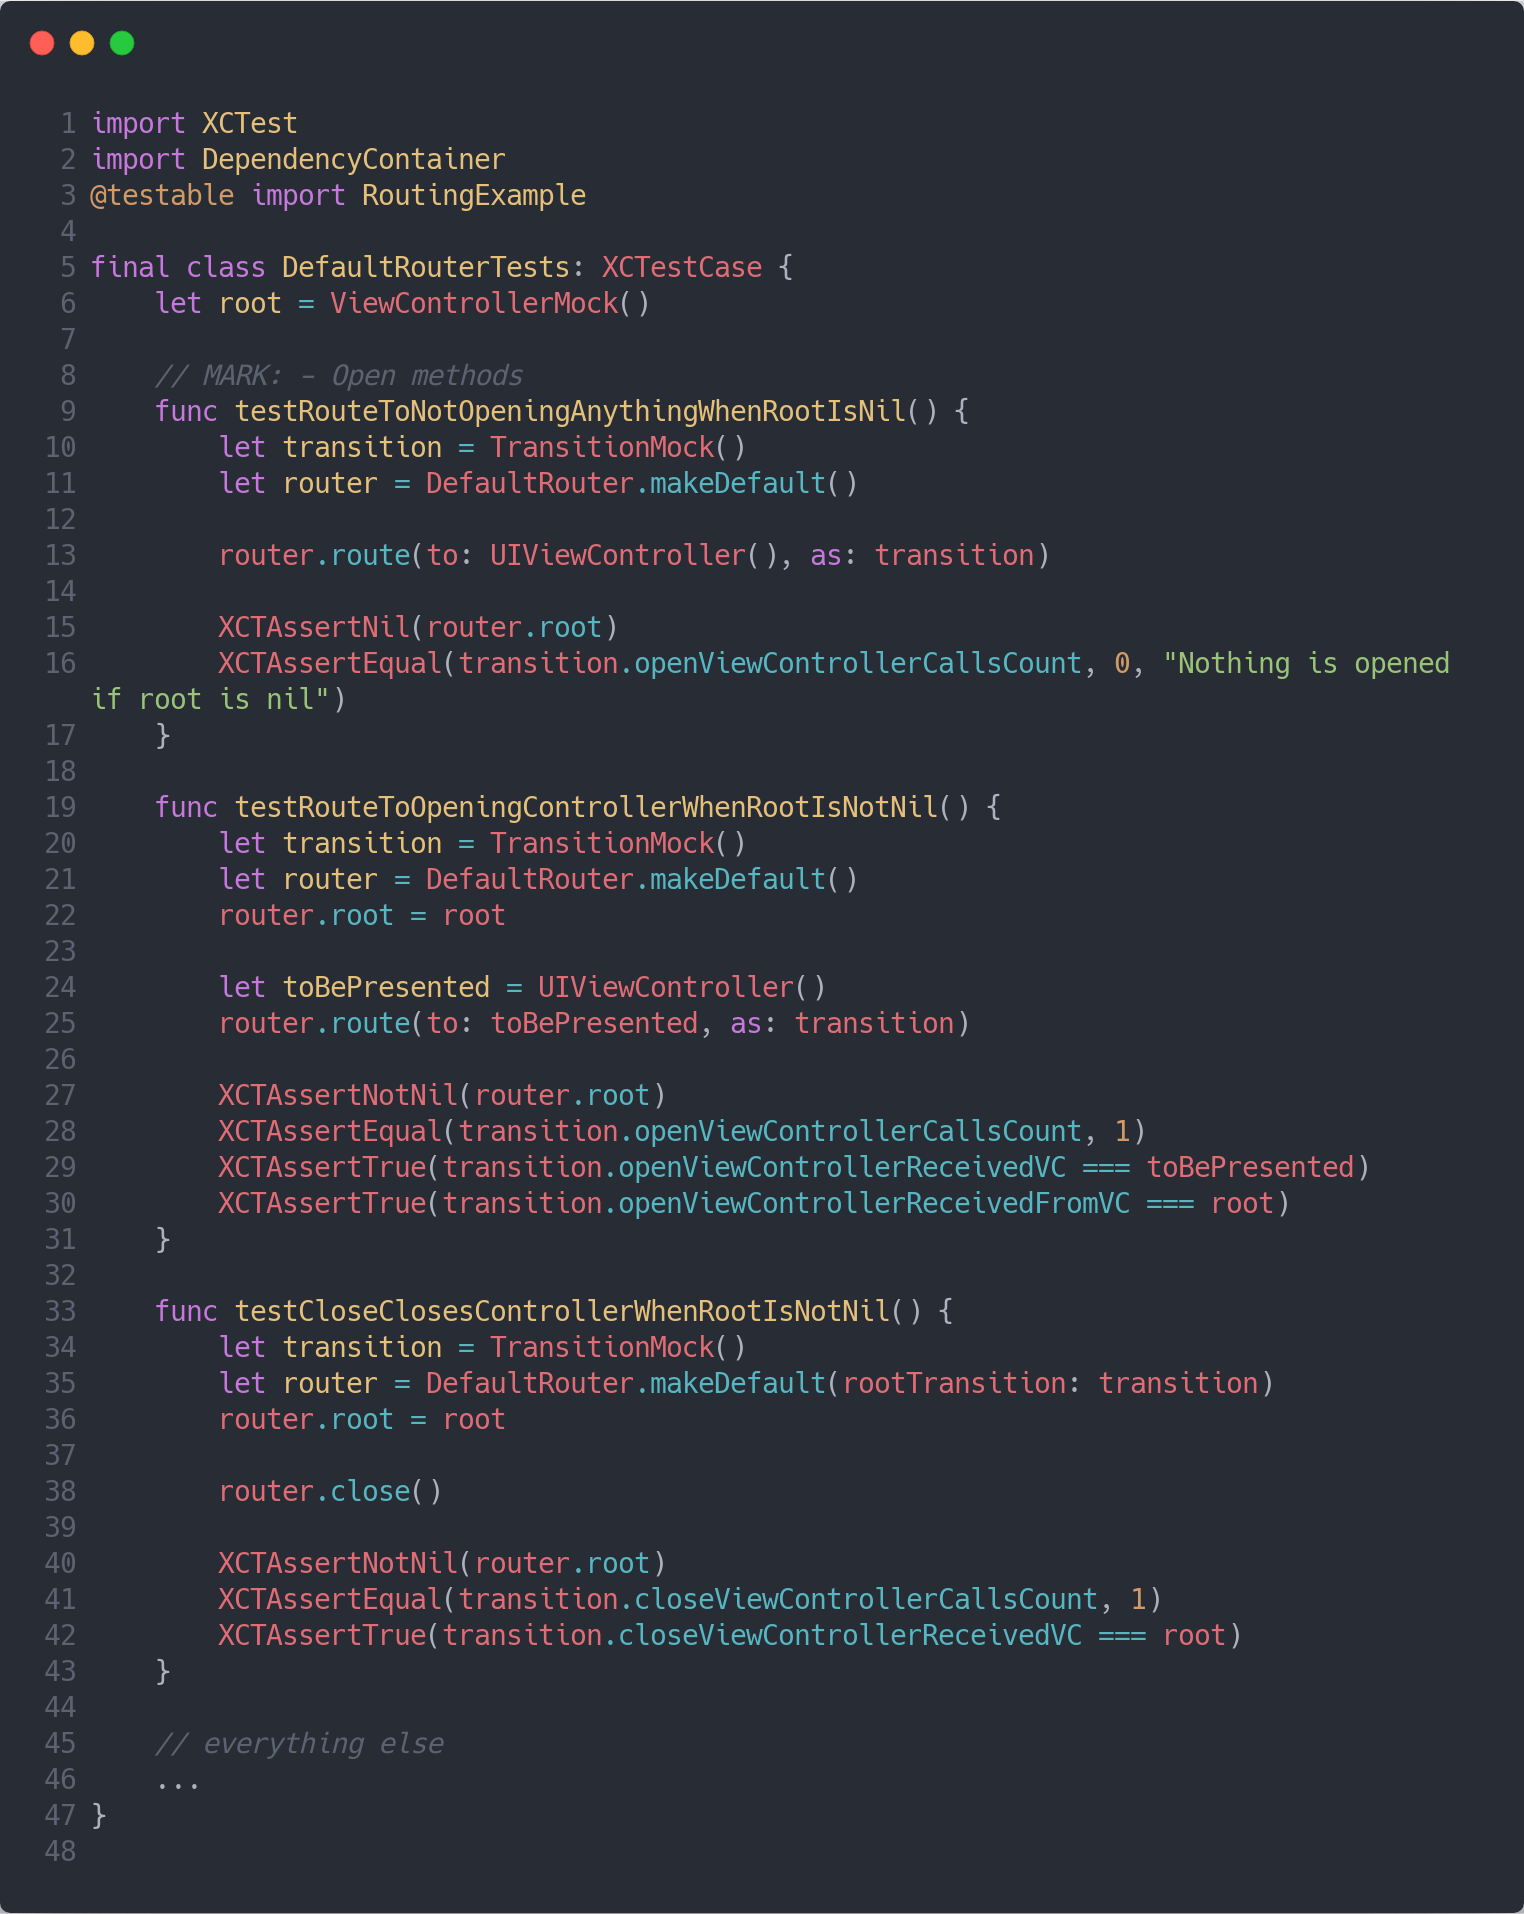
The first test validates that route(to:as:) does not open any screen when the router's root is nil. It asserts the root on line 15, as well as asserting that the transition mock has not received any method call. Simple, isn't it?
The second test then validates that route(to:as:) does open the screen when the router's root is not nil. We assign an instance of ViewControllerMock as the router's root, then call route(to:as:) and assert that the transition mock has recorded the open view controller call, and finally assert that the values passed in to the transition mock from the real router instance are the ones we expect 👏.
Finally, in the third test sample, instead of routing to view controllers using transitions, we're testing the close method, which closes the current router's rootTransition. It's just as simple as before, setup the values from lines 34 to 36 (note the use of makeDefault passing an argument, without having to pass the container. Our helper does that for us), call the method to be tested on line 38 and assert everything from lines 40 to 42.
Testing the DeeplinkRouter is just as simple. The source-code is available here. I bet you never thought that testing deeplinking would be so simple 🤗!
Testing Routes
Since our Routes are just protocol extensions from the Router protocol, all we need to do is to create a RouterMock that conforms to the same protocols our DefaultRouter does.
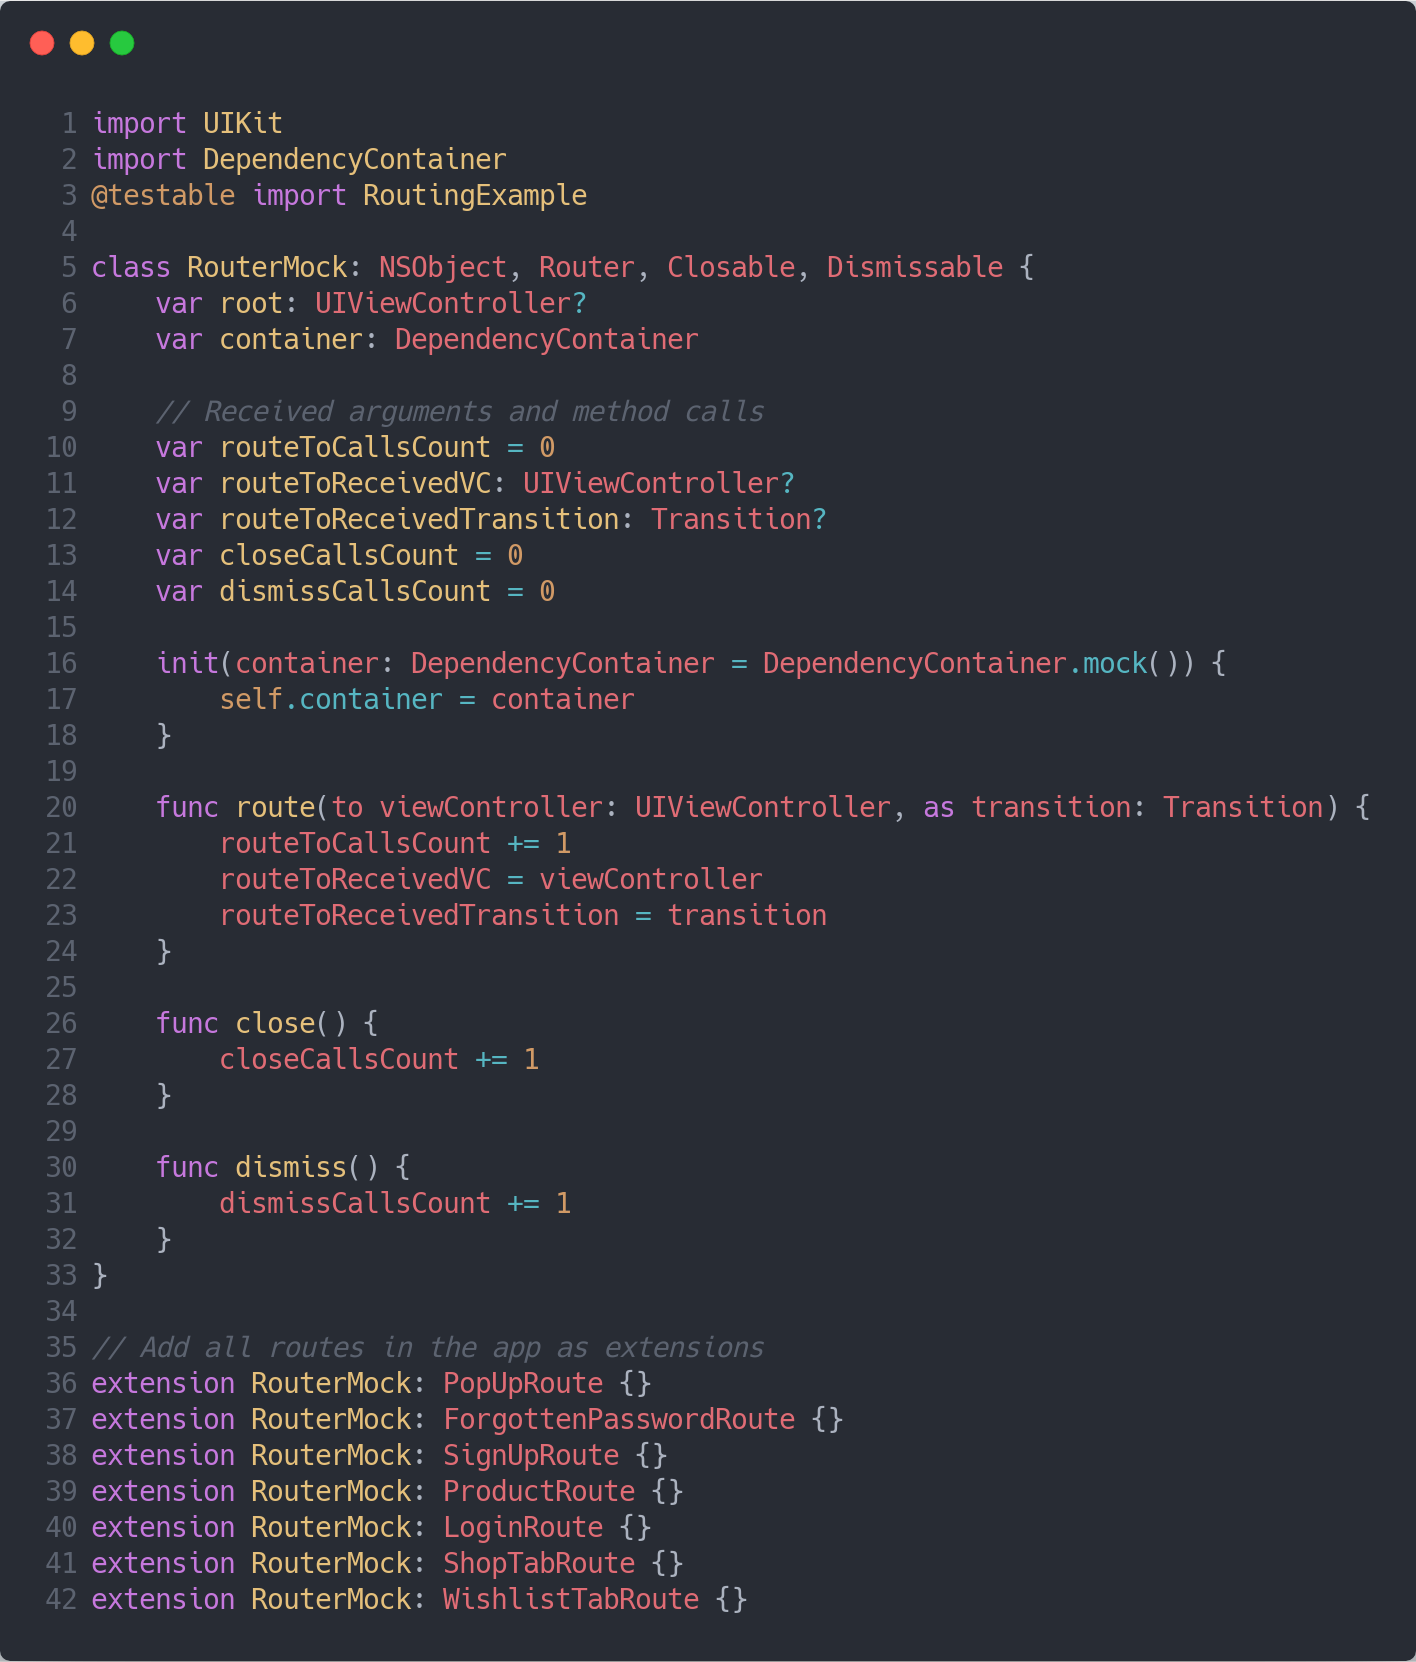
I've omitted the methods with completion handlers from the code above to make it simpler, but you can have a look at the full implementation here.
Don't get confused thinking that we're testing a mock class just because we're using the RouterMock, because we aren't. What we are testing in the code below is the LoginRoute that's defined as a protocol extension that we made RouterMock conform to.
RouterMock just provides helpers for us to spy on the methods called from the LoginRoute (and other routes) defined in the protocol extension.
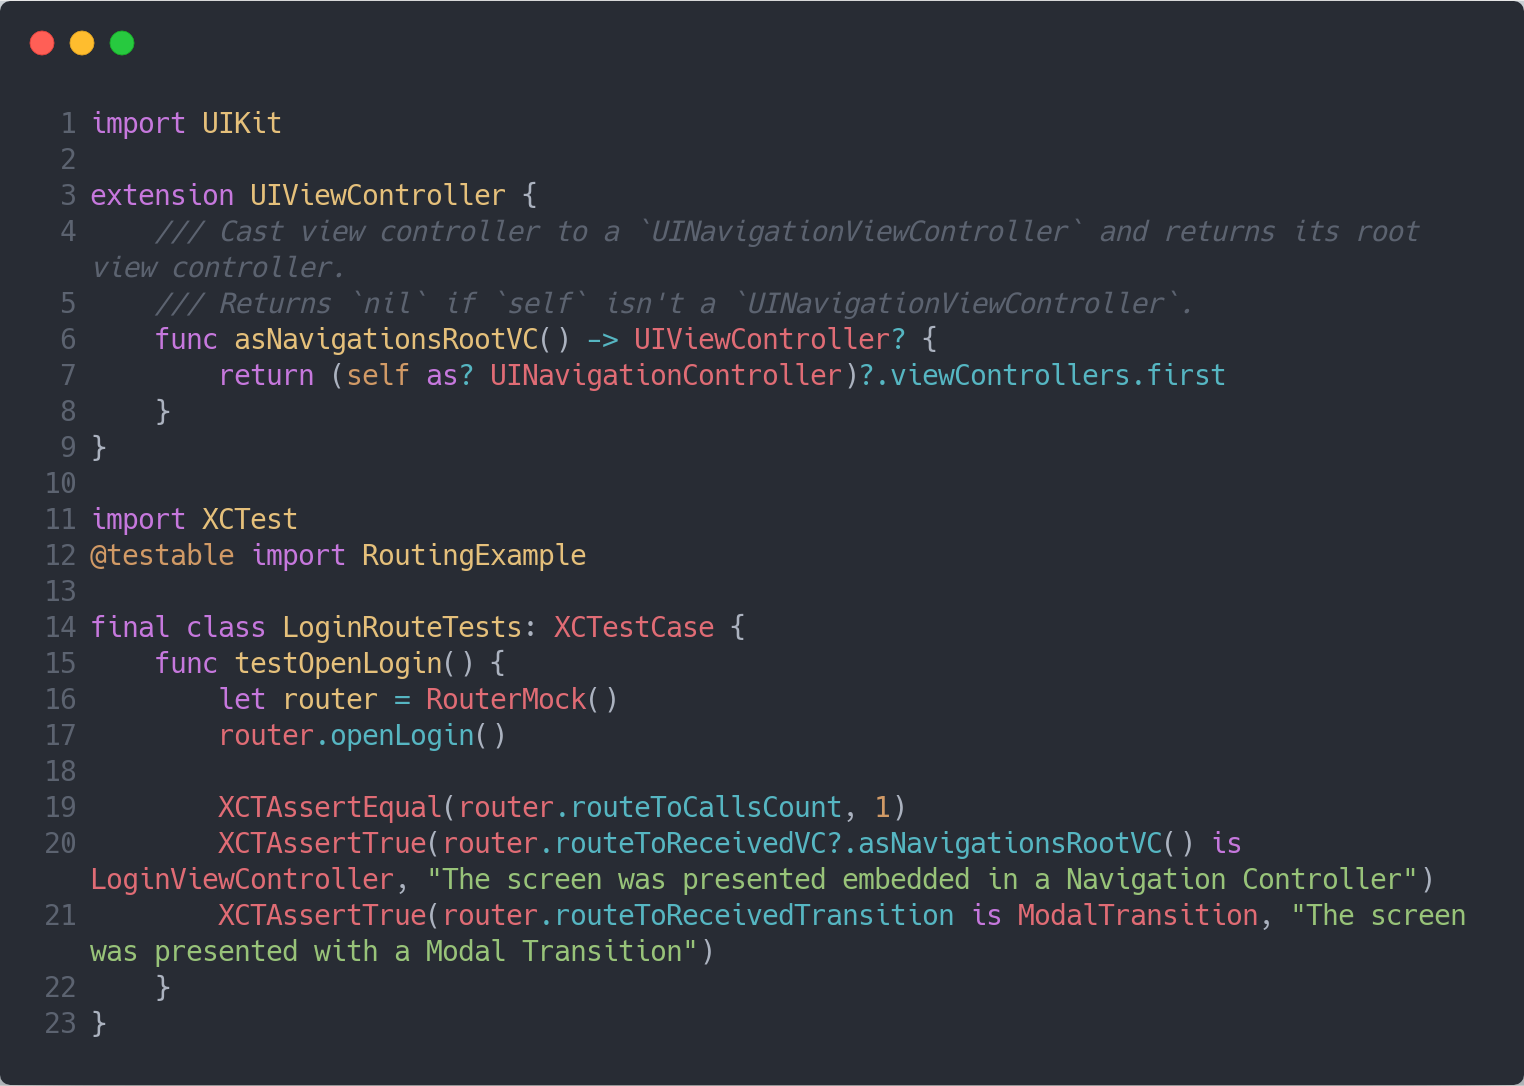
In the code above, we first included a new extension helper to our Unit Test Target that makes it easier to return directly the rootViewController of a UINavigationController instance, for cases where we're opening a screen embedded in a navigation controller (which is the case of the LoginRoute).
Then we wrote a test that ensures:
- the screen in being opened only once by asserting
router.routeToCallsCount == 1. - the presented view controller is a navigation controller with an instance of a
LoginViewControllerembedded in it by assertingrouter.routeToReceivedVC?.asNavigationsRootVC() is LoginViewController. - the transition used for opening it is a
ModalTransitionby assertingrouter.routeToReceivedTransition is ModalTransition.
Thanks to fact that we're including the DependencyContainer.mock() as the default container in the RouterMock, it ensures the view model being resolved in the route is also mocked. That frees us from any side effect that the real instance of the view model may have caused by running this test (think of network calls, etc.).
All routes tests can be seen here. Easy, eh? 🤯
Testing ViewModels
To finish off our unit tests we need to write some for our view models. This app is very simple and the only side effect it causes is presenting new screens, but bear in mind that this architecture is so simple that even if it was a real application it wouldn't be much harder than what we're going to do soon.
Each view model expects a combination of Routes that they define in the form of a typealias. For example, in the ProductViewModel it looks like typealias Routes = ProductRoute & PopUpRoute & SiriRoute.
Similarly to what we did with RouterMock, we need to create a new mock that implements all Routes interfaces, instead of using the real protocol extensions, so we record which routes have been called from the view model.
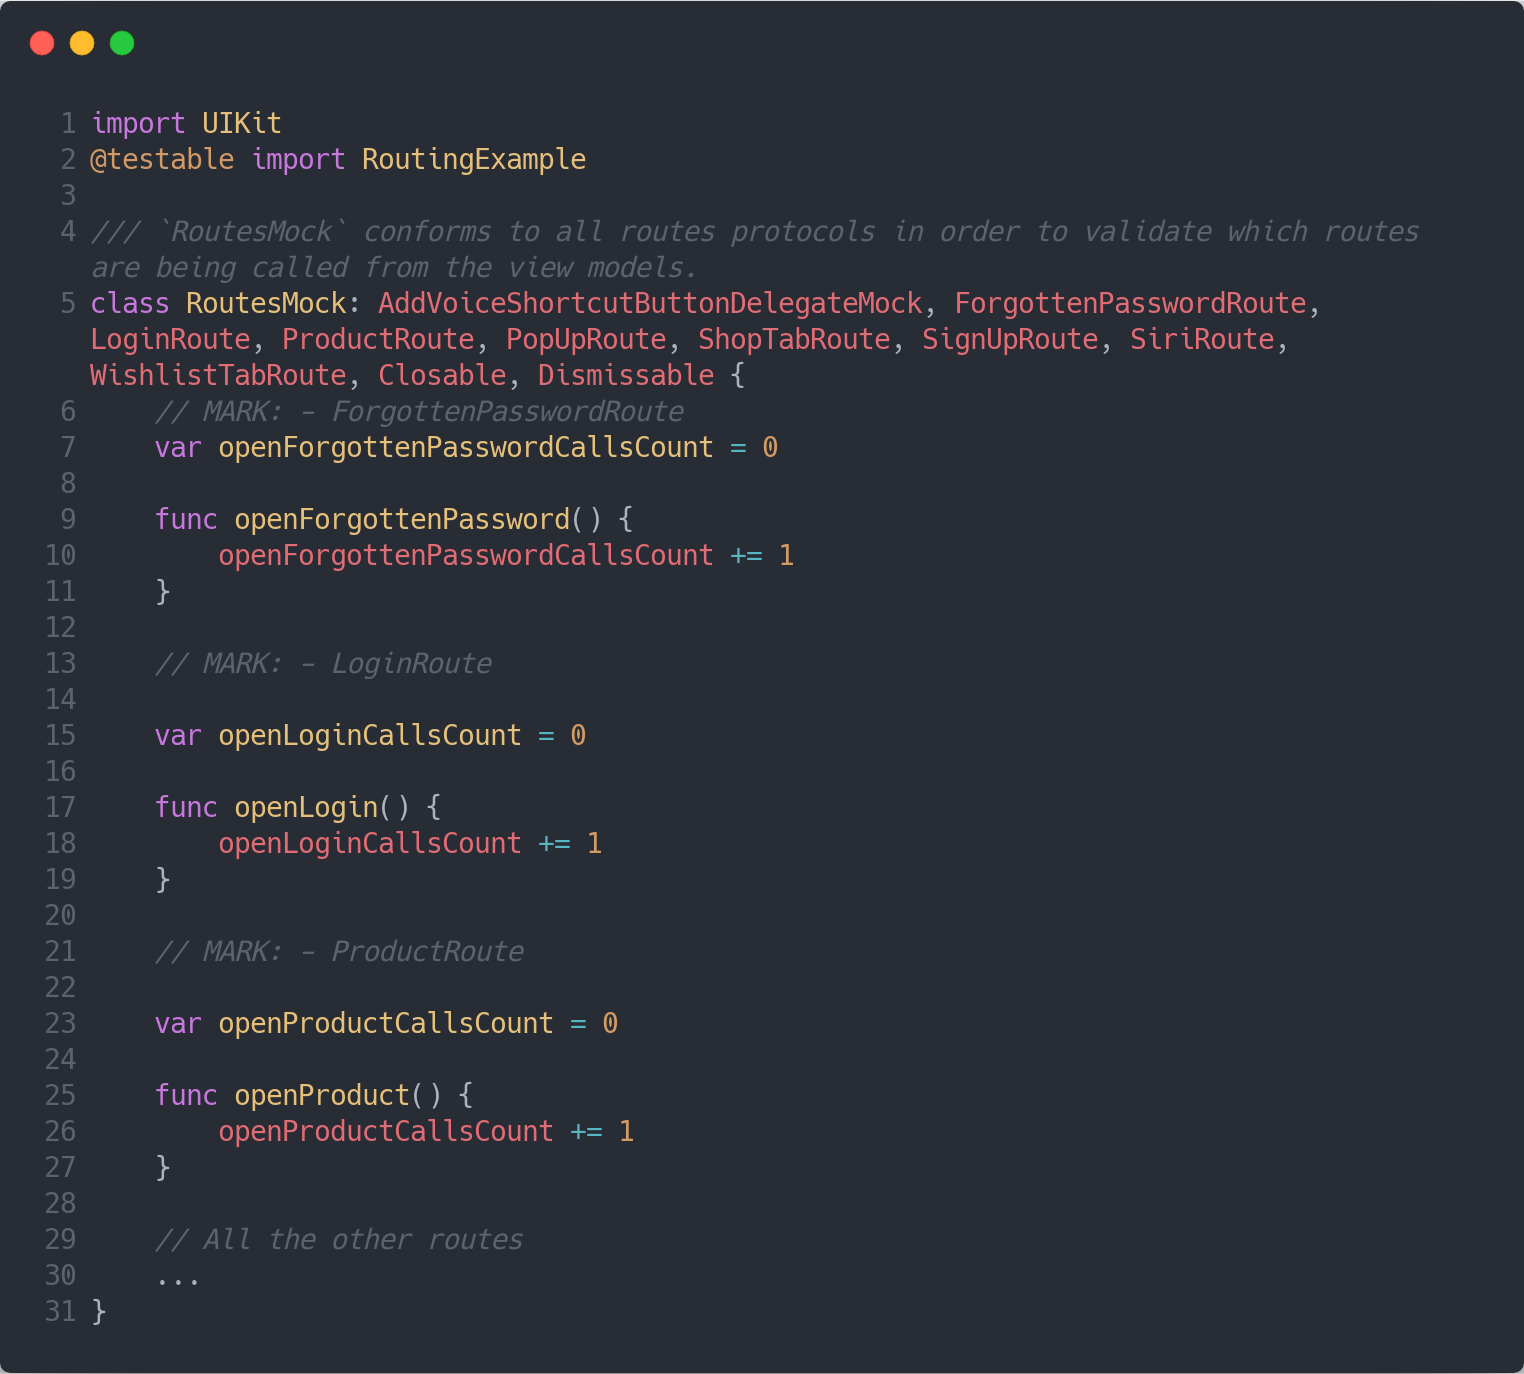
The code above only shows a couple of
Routesin the mock, for the entire implementation have a look here.
Now since RoutesMock implements all routes of the app, we can use it to pass in as an argument to all our view models in the tests!
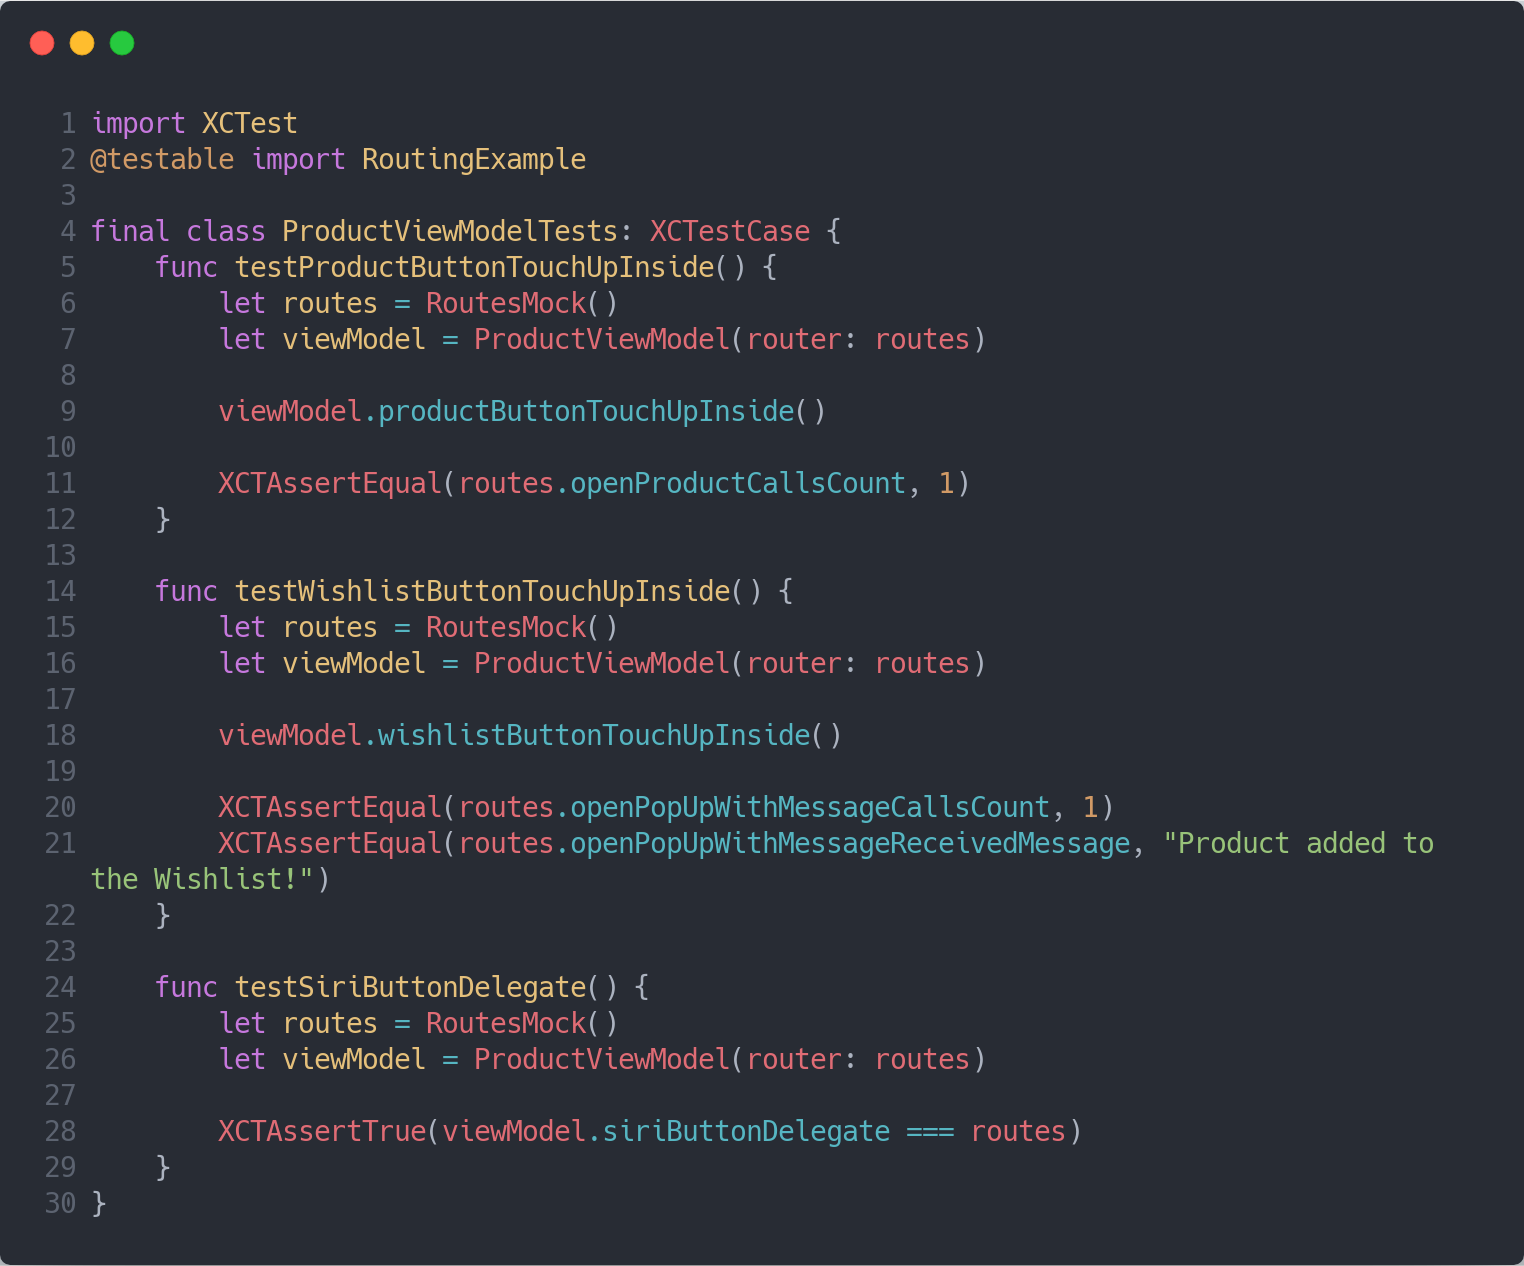
In the three tests above we're able to ensure that:
productButtonTouchUpInsidetriggers theopenProductroute method in theroutergiven.wishlistButtonTouchUpInsidetriggers theopenPopUpWithMessageroute method in theroutergiven passing the message"Product added to the Wishlist!"as an argument.the
siriButtonDelegateis actually therouteritself (sinceSiriRoutehandles the delegate).
The rest of the view models tests can be seen here.
Conclusion
Phew, we've come to the end of a lengthy series of posts about Composable Routing, but hopefully it's clear now that a simple but powerful architecture makes our project easy to understand, extend and test!
The source-code of the project is available on my Github, with all the implementations done.
Thanks for reading and let me know what you think. Feel free to message me up on Twitter too!